
How to apply press-on nails

Step 1
Start clean
Your nails need to be clean from gel, polish, and any other ointments. Wash your hands and dry them well.
You can also trim down/file your nails if the free edge (white edge) doesn't fit under your press-ons.
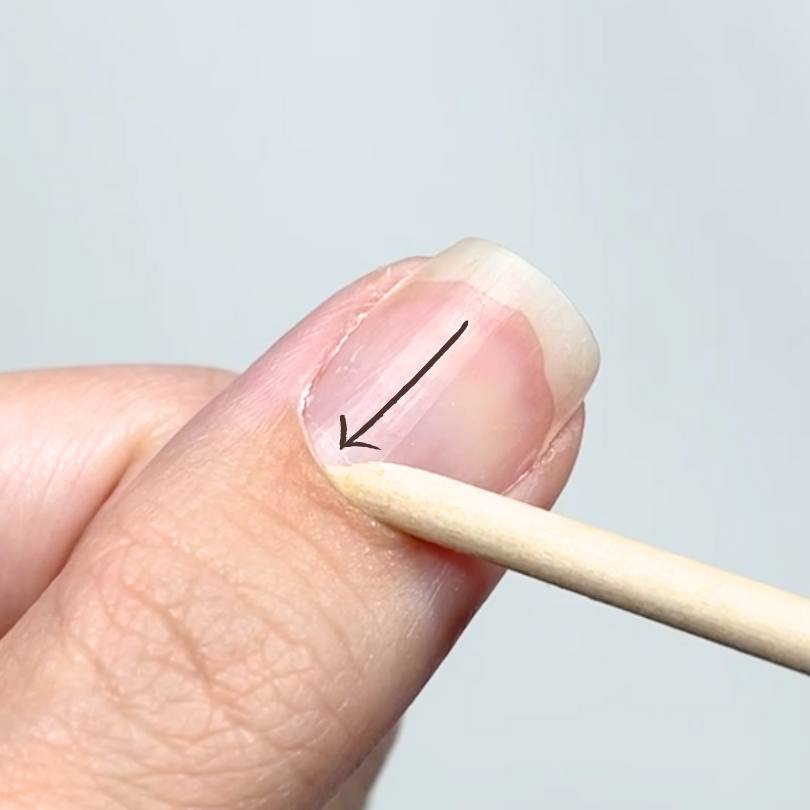
Step 2
Push back cuticles
GENTLY! Use a cuticle stick from your prep kit or your preferred tool. Do not poke the cuticle, only push.
This creates more space on the nail bed and gives the press-ons a natural look.
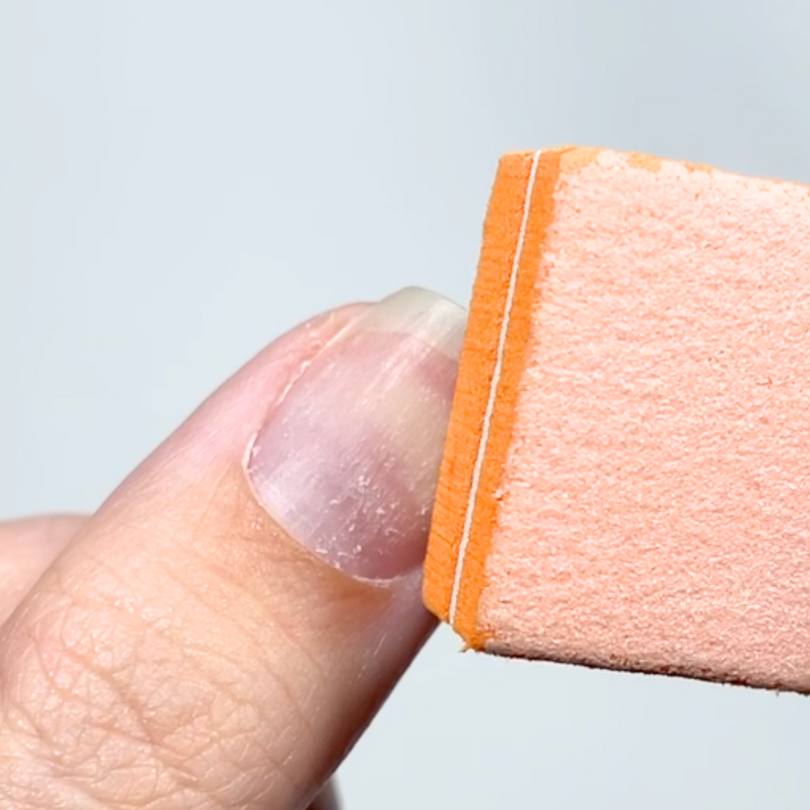
Step 3
Buff the nail
This creates small texture that helps with adherence of the nail glue or sticky tabs.
Do not apply a lot of pressure or buff too much. A light hand is just fine.
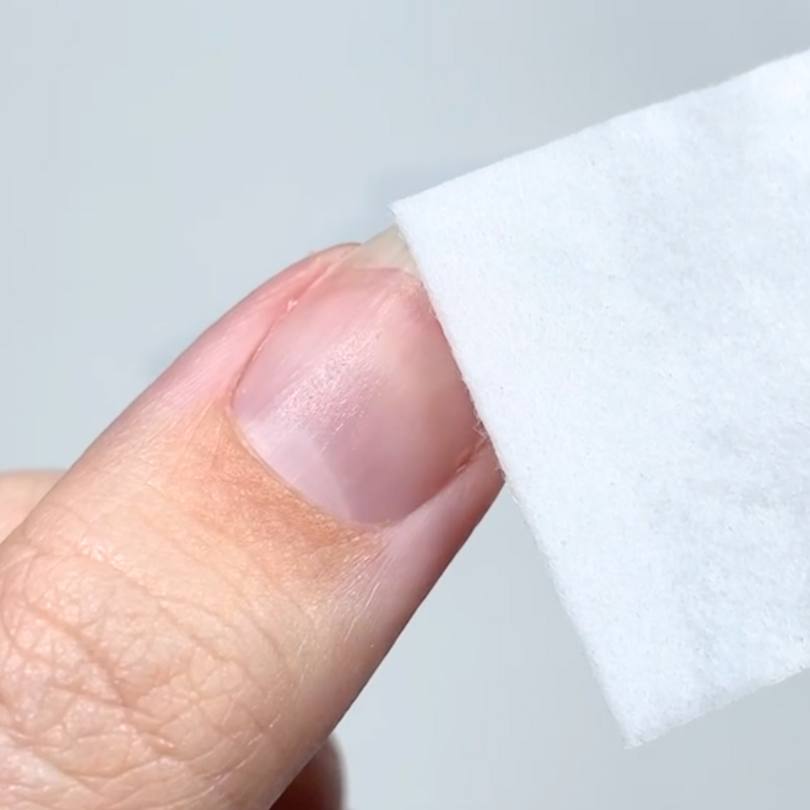
Step 4
Wipe down
You can use the alcohol pads in your kit, or use pure acetone for this. Avoid acetone with hydrating ingredients, this will affect the longevity of your manicure.
Make sure no dust or oil is left on the nail.
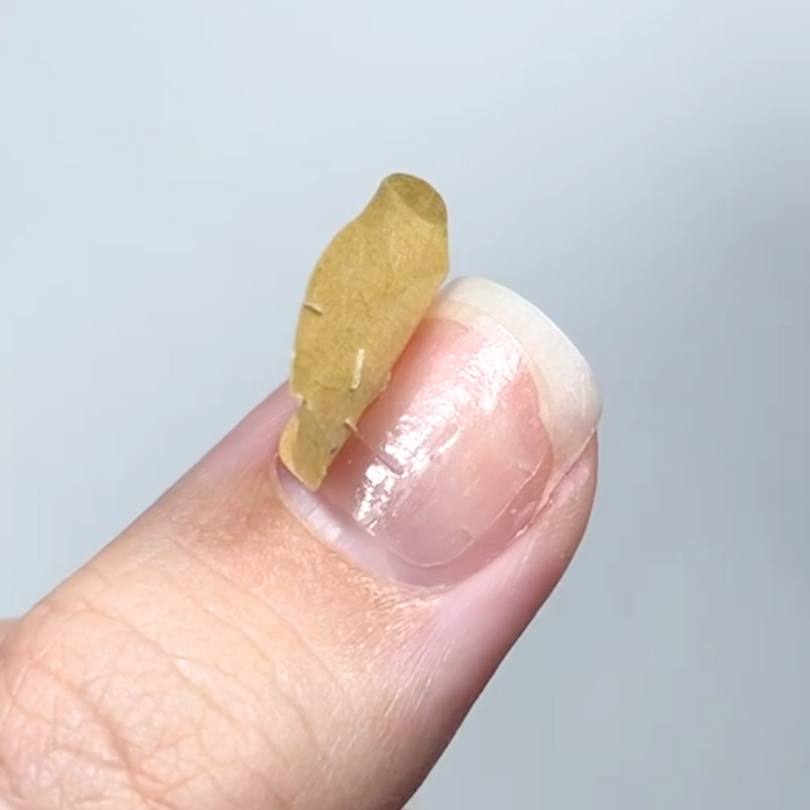
Step 5 - A
Sticky tabs
Find the correct size for your nail and apply the sticky tabs. Press firmly to make sure they fully adhered to your nail plate.
Peel off the paper and go to step 6.
If you want to use glue, go to step 5 - B
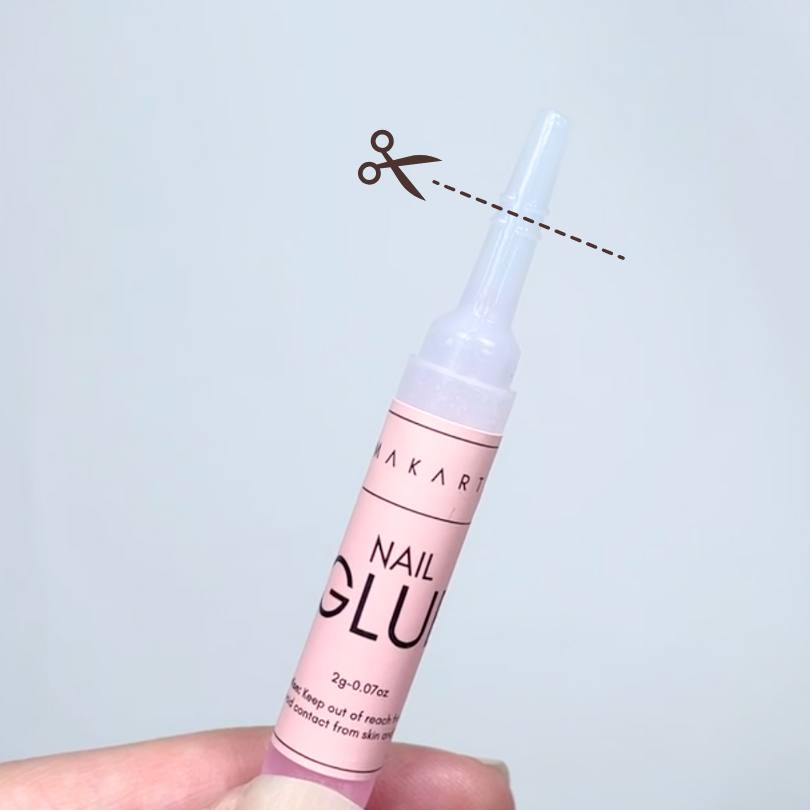
Step 5 - B
Cut the glue tip
Your glues come fully sealed. Make sure you cut the tip off to be able to squeeze out the glue.
Be careful, the liquid is VERY thin and runny when you first open it!
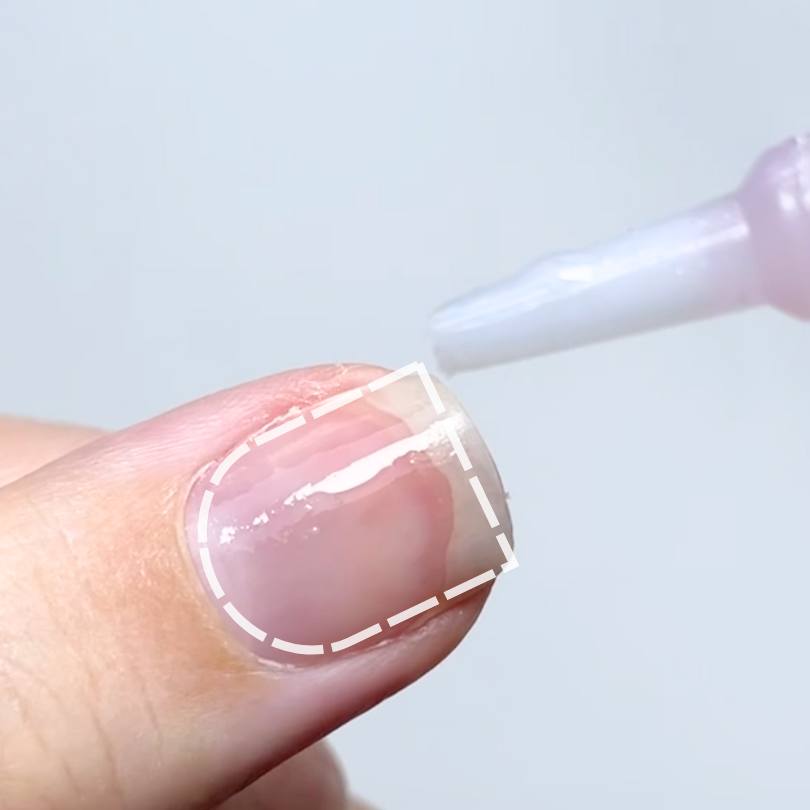
Step 5 - C
Apply on nail
Apply ONE NAIL AT A TIME!
Cover the entire surface of your nail. Do not apply ON the cuticle area, leave some space. The glue can irritate your skin.
If the glue is new, wait 5 seconds before applying your nail. Let it get tacky first.
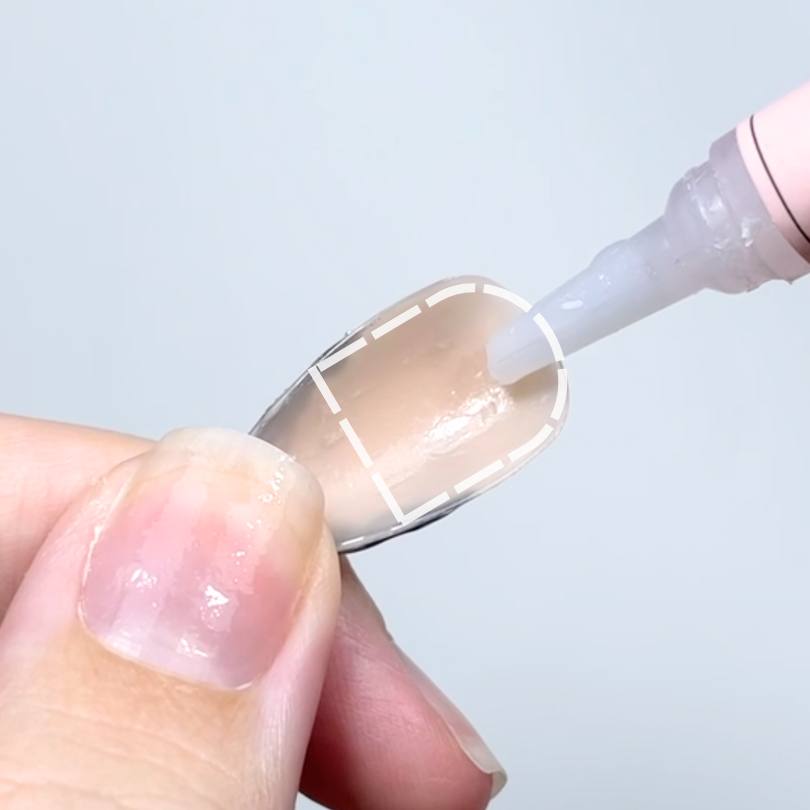
Step 5 - D
Apply under tips
Do ONE AT A TIME!
If you have extra space between your nails and the tips, you can add some glue to the underside to ensure that the apex is filled up.
Apply in the size of your natural nail.
Go to step 6.
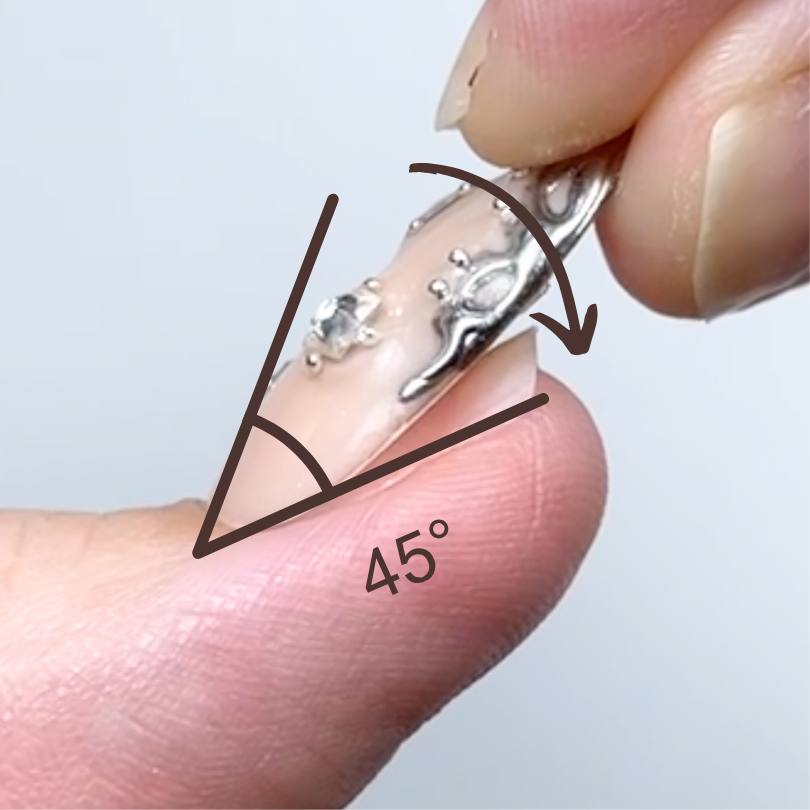
Step 6
Apply at an angle
Always apply at an angle to avoid bubbles and make sure the entire nail surface is glued.
For glue: press down the nail and hold it down by putting your finger on it for 10-15 seconds.
For sticky tabs, just press it down gently and massage the area for 5 seconds.
This applies to both sticky tabs and glue.
Step 7
Avoid water
Avoid water for 3-4h AFTER you apply the nails. This makes sure that the glue is fully dried and it will keep your nails from developing green spots.
Apply hand cream and cuticle oil as usual.